Showing posts with label slow food. Show all posts

Friday, March 25, 2011

Organic Gardening = Making Groceries At Home

Even though it snowed last night, the sun came back out today - finally in a position to shine on the organic garden area! I decided it was time to get started on my spring/summer preparations... first, finish raking in the donkey poop I had been dumping over the fence all winter... and churning up the top soil & donkey poop I had layered into the garden beds last summer.
DONKEY POOP + TOP SOIL (removed from around the barn) = amazing black composted dirt !!!
I made a new garden bed too today! As ya'll can see, I dont go for the high class look in my garden... i use whatever i have around to build with (meaning no $$$ is needed, no store has to be driven to). Sticks, old lumber left over from building, and rocks are how I put it together --- and its filled with 100% donkey doo doo.
I had some hay that got moisture in it, and was no good to feed to the animals... so i started using that for my paths I walk on, in between garden beds.
In the pic below... are some of the semi-raised beds I have slowly been filling up. If you are not impressed with how it looks, take a look at the work I had to do to get it to this point...
click here ::: Flashback to A YEAR AGO!
Some of the donkey poop had grass seeds in it, that have begun to grow.
I weed it out, then give it back to JuJu and the chickens!! The hens looooove to run off with the whole clump of grass .... :))))
THINGS THAT CAME BACK! :::::
so my fall winter garden didn't work out at all, because i had the big depressing surprise of having no sun during that time of the year (due to the placement of the mountain ridges). But many of the things i planted during that time stayed alive under the snow, they didn't die when wind & temperatures hit -20 f ...
My dwarf fruit tree have survived! The pear, peach and cherry!
and in my gardens beds...
the kale! the spinach!
the carrots! the rutabaga!
and many herbs are poking their first leaves through the leaves and soil - oregano, parsley, thyme, mint, bee balm, comfrey, chives, lavender and sage!

Xoxoxo

Tuesday, March 22, 2011

Duck Eggs Too!

This is so fun! This morning I went out to see if the chickens had left some more eggs in the nesting boxes... when i noticed a little nest built underneath. When I looked closer I realized my lady duck has started laying some eggs! The brown ones in the basket are the chicken eggs, and the white ones, only slightly larger in the ground nest are duck eggs.
So amazing, i did not gather them up yet, the nest with it's two eggs was so beautifully made, so beautifully set... and I have more eggs then i even know WTF to do with.
But of course, i am going to have to do a taste test ASAP, i have never eaten a duck egg before!
*
You can see only the slight difference in the chicken and duck eggs, in the pic below:::
(duck egg on the left, brown chicken egg on the right...)

XOXOxooox

Monday, November 1, 2010

Watercress, from grocery to pond

When it comes to food and saving money I can be one of the most oportunistic shoppers ya eva' met. Not that I am the lady who pulls out all the coupons and holds up the line cause the half of them are expired- I am the lady who is secretly looking for produce that will keep on giving. Produce with seeds in it that I can plant (winter squash, apples, pears, avacodoe), root veggies (like turnips, rutabaga, radishes, beets) I can put the tops back in the ground to later eat their greens and get seeds from them after they flower, I even plant the bottoms of my onions and eat the green stems that grow back out.
My latest grocery find though has me majorly stoked! Watercress... organic watercress being sold not at the health food store but at the regular ole' grocery... watercress that still had it's ROOTS.
*
I bought the watercress straight up to plant in my pond, mushy spring water spots...
I searched around my pond for a good soggy place to plant those roots in the ground, in hopes to have watercress growing in bunches over the next few years.
I dug a hole easily with a stick, you can see the water seeping into the hole...
Looking bee-U-Tee-ful... now i can pick a few greens off to eat and let the rest make a home here.
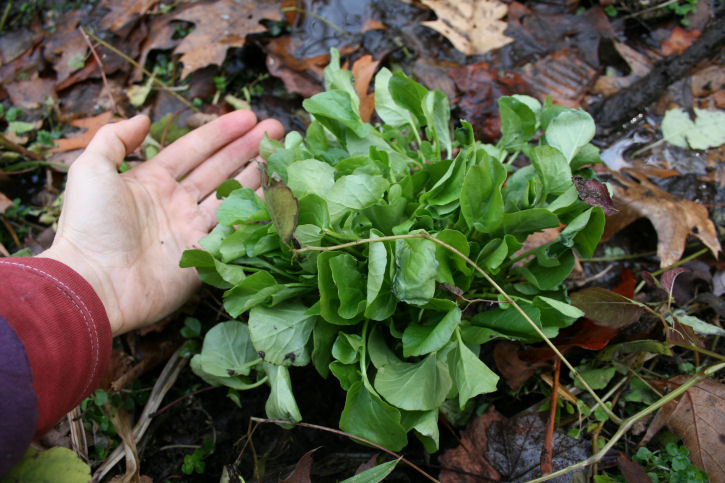
I love LoVe LOVE grocery items that keep on giving. :)
Do any of ya'll do this too, with grocery foods?
UPDATE:::
Thanks to oko box reader Jason for pointing out that this is a different kind of Cress then watercress, it's called * upland cress * and does not grow in the water like watercress. It grows on land.
Go to Jason's Blog, he has cool as hec pictures of animals he caught on one of those special motion cameras!

xoxox

Monday, August 2, 2010

Diggin' Blue Taters!

YAY! My organic garden made me a lil' pile of blue potatoes! Pretty neat-o!
Xoxox

Tuesday, July 6, 2010

Earth Oven: Cooking In The Ground (again!)

Epic wins and some minor fails! This 4th of July me and Bort re-visited the successful Earth Oven project we tried last summer ... for those of ya'll who missed it, who loved it, and who want to trouble shoot this labor intensive way of cooking here is how we did it this time....

THE EARTH OVEN:::::::::::::
The first step is to grab some shovels and do some intense diggin' - this time we made the hole less wide but very deep, keeping in mind what would be put in there to cook. I think this hole (in the pic below) was maybe 2-3 wide and the same deep. But ya'll know I can't do math, so this is a rough guess.
The second step, is to gather alot of good rocks to line the hole with. The rocks will hold the heat in better and release it for cooking!
The third step is to gather wood! Lots of kindling to get a raging fire started and stack up some good burning logs in the hole. The process of the fire takes many hours because as it burns down, you have to keep adding more and more logs, sticks, wood in order to make it hotter, and create more coals. FOR HOURS, the longer the better! We let this one burn for maybe 5 hours, but more burning time = better cookin'.
Eventually the fire will burn down to just hot coals in the bottom of the hole.... we made sure the fire would not spread either, by hosing down the area around it (since the grass and flora has been really dry lately!)
The fourth step ya gotta do is once it gets close to the time the fire is going to burn itself out, start gathering plants that are safe to put in the hole with the food --- things like thistle, nettles, bamboo leaves, burdock leaves (in tropical places big banana leaves would be great)... these plants will create steam in the earth oven to help cook the food. Indigenous people would wrap their meat in the leaves to protect it from the dirt.
ALL BURNED and Ready! ::::::::::
Once your fire is burned out and there is a pile of hot coals, now is the time to start layering the flora on top! This part should go rather quickly so that too much steam does not escape right at the beginning....
So the fifth step is to put the greenery in fast as ya can! Bort in the pic below is putting tons of bamboo leaves in first...
He wrapped his food in foil ---> what he wanted to cook for the party was two chickens, a buncha' ribs, corn and some veggies!
The food was placed in the center, and then more greens were put on top!
Which leads to the sixth step ::: THE BURIAL!
Steam will be rising, we just kept on shoveling the dirt back on top till no more steam could escape! That is why it's helpful to keep the dirt you originally dig out in a neat pile next to the hole...
ALL DONE, and time for it to cook!
We waited from about 2 pm to 8 pm before preparing to dig up the food and see if it worked!
*
THE DIGGING UP! ::::::
The last step on the earth oven TO DO list.... dig that shit up!
All dressed up for the party with a tiny audience of friends & family we got to diggin' up the chickens, ribs and veggies to see if it worked...
we dug up the dirt, then carefully pulled up the steamed to death greens we had layered. Here is where we learned a few things for later trouble shooting....
1. If you wrap your food in foil or leaves, make sure you wrap it VERY tightly- because dirt can get into your food.
2. The type of wood you use may make a difference on the amount of heat- just like when burning for house heat certain types of wood like locust, walnut, hickory will burn hotter then other softer wood.
3. Timing is everything! Make sure you have enough time to really have your fire going for many hours and be able to leave the food in for MANY hours - that way all your work will be worth it! Be aware that the thicker the meat/food the longer it may take to cook.
4. This round we forgot to put a pile of rocks directly on top the food before the flora and burying, more rocks= better oven!
For us, the ribs were cooked to perfection, but the two chickens stuffed with veggies didn't cook all the way to the middle (for reasons listed in the trouble shooting above, like not enough hard woods, not enough coooking time for the thickness.) For some reason also, the packet of veggies didn't cook, but the corn on the cob did.
BON APETITE! In my mind, it was way more a success then a fail! TOtaLLy worth the fun!
Smooches Xoxoxo

Saturday, June 19, 2010

CSA Saturday! (Community Supported Agriculture)

Every saturday I go out, down the road to an organic farm that's in my 'hood - a farm that has a box of freshly picked organic veggies, herbs and fruit waiting for me! This year I was not able to get my own organic garden prepared fast enough to grow most of my own food, and I was lucky enough to remember that a few years ago at the Waynesville NC Farmers Market there was this awesome lady named Julie who was bringing boxes of food all the way from Hot Springs for her CSA members......
I totally called Mountain Harvest Organics up on da' phone and joined!


So here is how it works for me - since I am local instead of picking up my organic box of goodies at a market I go to the farm every saturday. I look forward to it all week long! I pull up to a barn, which has a second story that was converted into a house for the farm interns. (Neato, right? Right on...) Underneath that barn house are the freezers where my box is kept --- but before I show you that, check out their awesome greenhouses ... There are several greenhouses where food is being grown, to extend the seasons for their CSA members and their own kitchen table. This is in addition to the 4 acres of farmland they recently fenced in high enough to keep out the deer. There are also pigs and goats - which I hope to get to pics of another time for ya'll!

Inside this greenhouse is tomatoes - which I totally can not eat... the cool thing about a small organic CSA is that the owners Julie and Carl are kind enough to replace/substitute some other veggies for the shit I am allergic too...YAY!
I usually pick up some potted herbs and flowers too, for discounted prices - they said late in the season people don't buy them much at the market so I have been building an herb empire at the Luck Cabin for a very small fee --- herbs i use in cooking every single day.
After getting some live herbs, I go down under the barn house to the big industrial looking fridge to grab my box!
I buy the big box - there are two sizes and the big one is really for a family but since I cook every single meal from scratch every single day and rely heavily on vegetables as the part of my diet I CAN have - I pay $25 for the week of cornucopia. Pretty sweet deal when you realize how much you pay for all this in the store - I get things like bok choy, chinese cabbage, broccoli, onions, kale, lettuce, kohlrabi, radishes, turnips, squash, cucumbers..... and even had two weeks of the most DELICIOUS strawberries of my LIFE!!!
I stick my money in an envelope - for this farm, I pay either per week, per month, and I bet they wouldn't mind if you paid for the year too! ;)
BTW- my last name is kinda mis-spelled here .... it's pronounced REE_SHARD.
Thanks to Julie and Carl for making my life 100x's easier, better, and tastier!!!!!!!!!!
XOXO

Tuesday, September 1, 2009

Chestnut Tree

I found this large chestnut tree over by the Haunted House down Willow Creek Road- I was super excited about finding it cause I like to collect chestnuts fresh off the tree (free food excites me)! I know it's not an American Chestnut, cause those almost went extinct back in the day...

"It is estimated that the total number of chestnut trees in eastern North America was over three billion, and that 25 percent of the trees in the Appalachian Mountains were American Chestnut.The American Chestnut is highly susceptible to chestnut blight, caused by an Asian bark fungus (Cryphonectria parasitica, formerly Endothia parasitica) accidentally introduced into North America on imported Asiatic chestnut trees. The number of large surviving American Chestnut trees over 60 cm (24 inches) in diameter within the tree's former range is probably fewer than 100."
Those green balls of spiky doom are what holds the yummy chestnut treasure - this tree looks as though it is going to drop more then I could ever eat. It's a very large tree with a wide reaching range of branches. They branch out so far I had to triple check that I was finding the right trunk they were growing from... below is a picture of what the bark looks like on a Asian Chestnut, so it will help ya identify the tree better when looking for it!
The leaves are rather large and glossy, with distinct lines, edges, and shape. The Asian variety seems to have very dark green leaves.
When the chestnuts are ready to eat, the green spiky balls turn dry & brown - then fall to the ground. These things are not soft or hairy- it's more of a porcupine type thing going on...or maybe a ball of hospital needles - so grab it lightly and slowly.
Generally the balls open up and the chestnuts fall out! (Thank Gawd!) Pictured below is an open spike ball from last year- cause they are not quite ready yet this season, chestnuts fall to the ground when it's cold out and you are gearing up to hear Christmas songs in every store.
(I don't have a pic of the chestnut itself here, but click on one of the cooking links below and you can see what it looks like.)

Here is how easy it is to prepare them : Chestnut Cooking Tips! Just cut some X's in the skin and roast in the oven or boil! You can make other recipes with them too...mmmm.
XoXO