Craft bonanza! After making my patchwork blankie out of scrap fabric I sat down with a notebook & pen and started dreaming up other simple DIY projects. This handbag is not hard to make and looks very eco chic (superior handmade style!)
It's also made entirely out of fabric, so all you need are basic sewing skills to put it together.
*
STEP 1 :
Choose two contrasting fabrics, and pin them together in a rectangle shape to cut out.
 I chose some velvety animal print, and a kimono type fabric for their flamboyant contrast.
 STEP 2 :
Fold over the top edges of the purse, and sew a strong seam at the very bottom. This is to create a drawstring style hole for the purse straps to pull through.
 Both sides should then have the drawstring hole, which are sewn into the inner side of the purse. (see pic below)
 STEP 3 :
 Both sides should then have the drawstring hole, which are sewn into the inner side of the purse. (see pic below)
 STEP 3 :
Fold the purse over, with the drawstring holes lining up evenly. Sew a seam along both sides (left and right) but NOT over the drawstring holes.
 The purse should then look like this pic below... my animal print is the inner part, and the kimono fabric is the outside of the purse.


 Use a big safety pin to pull your braided strap through the drawstring holes on both sides...
 ...tighten the straps, then tie them together at the top.

 The purse should then look like this pic below... my animal print is the inner part, and the kimono fabric is the outside of the purse.
STEP 4 :
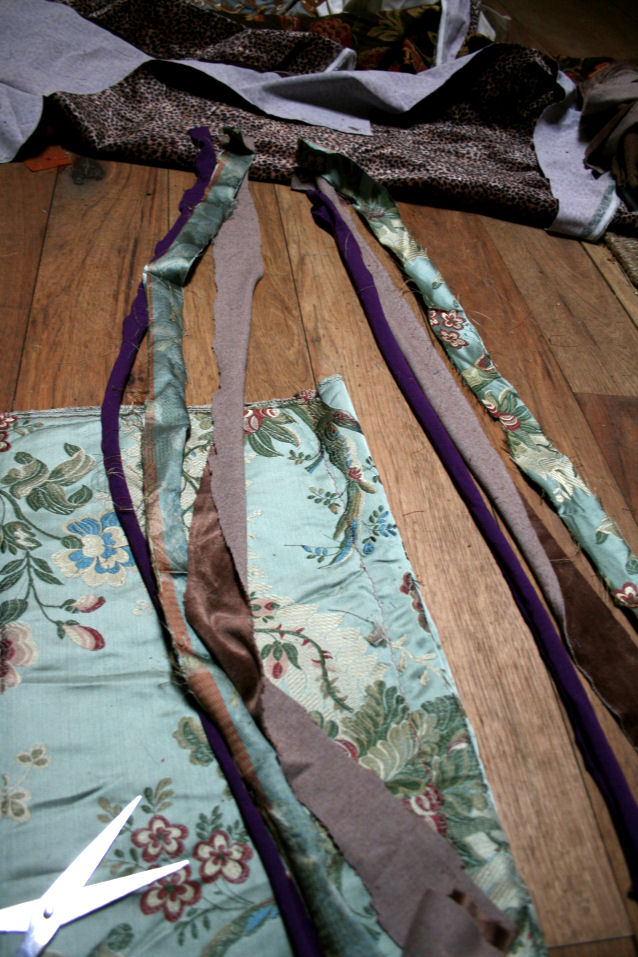
THE STRAPS ::::
Cut six strips of scrap fabric (or tie pieces together), make two groups of 3 strips, tie a knot at the top of each one, then BRAID! yay! I love braiding. :)
 Use a big safety pin to pull your braided strap through the drawstring holes on both sides...
 ...tighten the straps, then tie them together at the top.
ALL DONE!
HANDBAG HEAVEN :::::
How easy and cute is that?! Plus functional! You could use this as a purse, but also as a knitting/crochet bag! Or maybe carry your small pets around the house in it. ;)
 I like this eco crafting project alot... now back to my notebook to think up more things I can do with this fabric.

 I like this eco crafting project alot... now back to my notebook to think up more things I can do with this fabric.
****
Here is a quick lil' tutorial vid for this DIY Purse project -(if you learn better with music and short commands...) ;)
Xoxoxo