Showing posts with label earth friendly. Show all posts

Sunday, November 14, 2010

Eco DIY: Organic Cotton "Alf" Dress

Yeah, ya read it right... ALF! ha ha ha.
This sewing project is more of a minor upcycle deal, see ya' don't need "Alf" to make this dress...(even though you might think you do!) All you need is an old t-shirt that is nasty, doesn't fit, etc from your closet, grandmaws closet or the thrift store... a t-shirt with a whimsical logo that can be cut out and re-sewn onto a new outfit. I put mine on an organic cotton dress I made from some locally woven fabric. But you could do this with a hoody and put the old logo/character on the back.
THE BEGINNING:::
I pinned down my dress pattern on the fabric, which was the pattern I traced from another dress I already had.
And then chop chop! Cut out the fabric, leaving enough room for the side seams.
I had folded the fabric over, so that the front and back would be cut at the same time. I like efficiency... :)))
I left the pattern pinned on while I sewed in the seams along the edge... then unpinned the pattern.
I love making things adjustable! So I made the top of the 'sleeves' or straps the kind you can tie to any size....
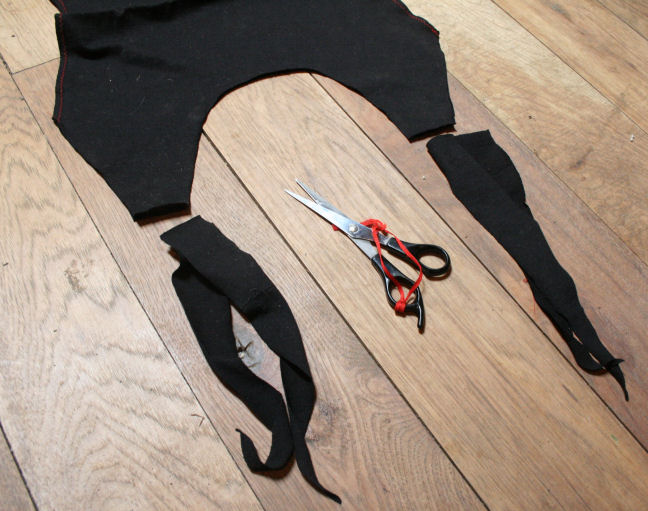
Once the organic dress was sewn together, it was time for ALF!!!
CAREFULLY pin your logo on, you want it really flat and even so that it doesn't wrinkle or bunch up the front of the shirt or dress or hoody or whatevs you may be sewing it on...
Then SEW! I used the basic straight stitch and slowly went around the circle of Alfness...
ALF HYSTERIA:::::
hysterical? lovable? weird? so was Alf.
You can wear it with or without a shirt underneath... summer time, or fall time...
party time?!? WWAD ? ;)

XOXOXOxox

Tuesday, September 14, 2010

Up On The Roof (Scrap Wood, Handsaw & Milk Paint)

This is the BEFORE picture :::::
(Before I put the red scrap wood "sunburst" decoration in that triangle below the roof...)
I had some thin long pieces of scrap cedar that had been cut off larger pieces of wood used on my deck - I decided to paint them with red Milk Paint and use them for a lil' exterior cabin decorating. I was inspired by my longing for the ornate houses of my childhood in New Orleans - a city where people don't hold back on the splashy colors and elaborate carpentry work. While what I did so far isn't quite as fancy as the French Quarter, it certainly gives my Luck Cabin the funky flare I love to come home to!
SUPPLIES I USED::::
  • Scrap wood
  • Milk paint
  • Handsaw
  • Hammer & nails
This exterior beautification project cost me under $5 (some money for the paint) and only a few hours of warm tanning time on the roof - it took VERY little skillz. Pretty rad when it's cheap & easy, right?
So I brought all the supplies up on the porch roof - I decided to measure each one by eye'ing it artistically, then using my handsaw to cut the angles to make it fit. I was not a perfectionist about it, but I wanted it to look symmetrical and have a good flow.... aka: SunBurst-y feeling!
The easiest way to start this, is by placing the one in the middle first, since it is perfectly straight up and down - then 'burst' outward from the center point.
So the only skillz you really need, are to push the paint brush around to paint with the milk paint, and to push a handsaw back and forth - and to hit a nail with a hammer....
AND WA-LA.... totally cute & affordable home improvement! This idea can be added onto, while I was up there I began to think of shapes that could be added, variations on the pattern, and other colors I could add in too.... circles or squares, gingerbread decor - I may keep going with this.
Here are some photos of the end result from afar..... AFTER....
Compare them to the top photo for a full Before and After ::::::
I love it! Makes me wish the stupid power lines were not in the way.... anyone wanna get me some solar panels!?? ;)

Xoxoxo

Monday, September 13, 2010

(My) Reasons For Being Earth Friendly

I was always drawn to it... nature, but I grew up in the most spotless chemical cleaned suburban house in the city of New Orleans. Everyone evolves, and I'd like to think I came from one extreme but my soul decidingly bridged the gap by seeking the other (huge city to huge forest). It didn't happen overnight, being eco wasn't a trend I picked up, in fact if anything it made me very 'uncool' as a teenager and beyond- only as an adult is my lifestyle (sometimes) appreciated for what it is :::::
a life that doesn't destroy our basic resource & lifeline, nature in it's wildest form.
*
It's nothing I discuss often with others, but here are some reasons why I live the way I do::::
*

  • I refuse to take part in the pollution that I believe causes chronic diseases and human suffering (like the auto immune disease i have...)
  • I feel that all creation is equal and the plants, animals, trees all should have respect- the food chain and survival chain should be used wisely not selfishly
  • I only want to put energy into supporting a lifestyle that which won't continue further destruction (long term or short term) of nature- putting my energy into skills for homesteading, rewilding, and organic minded activities.
  • I don't want to support with my $$$ any asshole company helping pollute on ANY level (that goes for chemical, fashion, food, and also big Pharma putting drugs through bodies and into our water)
  • I believe that children deserve the peace and experience of true wildlife, for reasons mental, spiritual and vastly biological- i think without it kids are detached and will behave detached in many other aspects of their life (and when I am an old lady those kids are going to be running sh*t, ya know!)

*

I don't walk on eggshells, have less quality of life or suffer by refusing to clean my house, paint my house or fix my house with chemicals. I don't suffer because I refuse to buy any clothing slave made of chemical fabrics (unless thrifted), I feel good about what I put on. I don't have less a life because I go by car very little and instead I choose to enjoy & explore the area I actually live in.
I realized many years ago that our lives are formed mostly of (raised) habits, and as many times a day as I am told by people "it's cool you live like that, but i could never do it".... i know from experience that we all really could.

XOxoxoxo
(ps- the pic above is from this summer when my sister's kid came to visit me.)

Wednesday, March 10, 2010

DIY: Decorative Bamboo Ladder

Me and my mom were looking through the eco friendly Viva Terra catalog the other day (together ova' the phone) when she fell in love with their towel ladder featured as a super zen bathroom accessory. I remembered a few years back when they had one made of bamboo all decked out with organic towels hanging from it, and told her I would try and make one that was free, simple and with stuff I had around the house.

Here are the supplies you need:
  • bamboo
  • hand saw (or electric)
  • cutting shears (optional cause you can use your saw)
  • hammer (or something similar to pound with)
  • string (like hemp, jute or organic cotton)
FIRST: I cut two large pieces of bamboo approx. 5 feet high for the side pieces (posts), using a hand saw. The two sides must be the exact same size.

SECOND: I cut 5 smaller pieces of bamboo with my cutting shears (super easy!)
The 5 rungs of the ladder to hang your towels on can be a wide/ long as you like - depending on the width you'd like your ladder to be. Make sure these are all the same length though, more or less...
THIRD: I took the rungs and placed them on the ladder how i would like them to sit, then with a pencil marked lines on the right and left side of each end piece - meaning each rung had four marks, two for each side.
FOURTH: I used the hand saw to cut in grooves, for this neat little magic trick you can do with bamboo... you saw two parallel lines deep enough to hit the hollow part and.........
Then you take a hammer (or some kind of pounding tool) and bang the center between the two parallel lines - which causes a perfect square to open up. Usually it takes a hit or two before it breaks, and split in the middle and the very edges where your saw line ended.
Like this pic below... it just pops open, into a perfect square (or rectangle) - and you pull off the broken pieces with your fingers.
FIFTH: After cutting the grooves on the right and left side of the ladder for all 5 rungs, you can then place the rungs into the grooves.
SIXTH: With the rungs in place, it's time to take some eco friendly string (hemp, jute?) and tie them to the posts of the ladder. I used organic cotton fabric which I cut in strips because it was what I had around.
The type of string you use will change the look of the ladder - for a more island, zen look I think brown hemp rope would work best. But for me, I like the funky bold white ties cause it gives it a handmade primitive look. :)
I bet you could also paint your ladder with Milk Paint too, if you wanted it a certain color to match your decor!

Check out my end result - I totally think it's a big success!!!! And was FREE.
XoXoxoxo

Tuesday, January 5, 2010

My Electric Bike Is Here!

Oh yeah! It has finally arrived! My electric bike was due before X-mas but because of the snow, ice, and funky weather conditions that won't seem to let up Fed Ex became terrified of my road - flat out refusing to drive down it because it was on the "north side of the mountain" (which I am not even sure that is true? ha.) I made a deal to meet the feds by the mailbox and waited in the freezles cold for the bike my mom lovingly gifted me, that will most likely change my life. But not just yet.
The bike came folded up with alot of stuff attached to it with zip ties - even though it was fairly easy to figure out (only cause I had help!) It was kinda confusing since the box didn't come with any specified directions. The tires are purposely flat for shipping and I have to write the company to ask about charging the battery (and how to operate this shindig in general)... even so, I would not have taken it for a test drive in this frigid weather unless someone paid me by the minute to freeze my toodles off out there!
Rockin'! This is the mostly put together Liberty Electric Bike (minus pedals, front reflector, and my wizard of oz style basket)...
I got a set of keys to freedom! It's like being 16 and getting my first car all ova' again. :)
I can't wait to test it out, but will have to wait for the temperature to be higher then 10 degrees (for my own personal comfort), figure out how to work the throttle, um do the keys turn it on, and can the battery be over charged???? So many questions about this thing.
If you wanna read more about electric bikes go here.

PS- What should I name it?!!

PSS- to those peeps with chem sensitivities I think an electric bike is a good alternative to exhaust spewing transportation, but just wanna let you know it came smelling like factory, plastic and tires... it may need to air out a little before being brought inside the house.
XoXo

Tuesday, October 14, 2008

Low Impact Living: Green-O-Ween

Haven't made your Halloween costume yet? Scoot over to Low Impact Living to find out eco safe ways to celebrate Halloween, that won't harm the earth or your bank account! Make sure to check the comments section where many readers give their own Halloween tips too &
'Make Halloween Less Scary' for the planet!