Showing posts with label DIY. Show all posts

Monday, April 4, 2011

They're BAccckkkk!

Another sunny day! Today I was planting seeds (in the garden beds and tree stumps)... which is always fun- but while i was putting new food into the ground i found a bunch of herbs I planted last year coming back up! This is when it feels like all the work paid off... not that it was ever work. Quite some hardy organic herbs here, because they had to withstand cold down to -20 degrees F, no sunshine at all, and feet of snow and ice piling & melting and piling again. **************************************************************** ......... Introducing the Luck Cabin's herb gardens :::: * catnip! (above) oregano! (below)
chivessss....
winter savory even lived!
some kind of fancy purple sage...
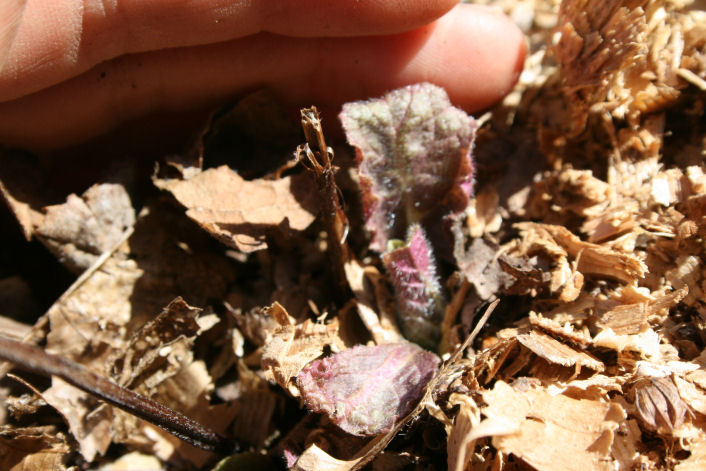
and comfrey (can not live without it, it is instant bee sting relief!)
lavender... for washing my hair in!
parsley!
Thyme!!!! mmmm
Bee balm (the red and the magenta kind)...
all my mints, including chocolate!
sage :)))
and Yarrow (i use in my homemade bug repellent oil!)
YAY!!!!!! There is lemon balm and hyssop and goji berries that came back too... the dwarf fruits trees i planted last summer are making leaves and flower blooms. This is when i feel like i am in heaven.

*

XoxooxoxxoX

Saturday, April 2, 2011

DIY: Gluten Free Rice Milk

xxxxxxxxxxxxxxxxxxxxxxx

Rice milk is killing my bank account. I love it, I drink it everyday, and when i don't have it it's all i think about. It's my addiction and since it's a healthy one I thought it was about time to start making my own - (like when a meth head realizes they can make their own meth lab! Except that is not healthy and they have to condemn tha' house after.)


* Since I found videos easier then the recipes online, I made a lil' vid showing my first attempt at making rice milk at home!
* This probably cost me around $5-10 dollars, to make 1.5 gallons of my own rice milk... when buying amazake 2-3 small drinks would cost me as much! I have no idea why companies charge huge amounts of $$$ for rice milk since making it actually doesn't cost much and a big part of the recipe is just water.


SUPPLIES YOU NEED ::::
*rice (brown is healthier)
*water
*Sweet Options: sweetener like honey, maple syrup or rice syrup, etc...
*Flavor options: vanilla, almonds, and/or other grains you can tolerate
*Pot, Spoon, Blender, Strainer (cheese cloth or stainless steal)


Do ya'll have any non dairy milk recipes? I would love to hear them! Almond, soy, and gang!

xoxoxox

Thursday, March 24, 2011

DIY: Camo Shorts made into Camo SKIRT

I had found this pair of boys camo shorts at the thrift store sometimes last summer... it took until now for the strong detergent smells to actually be rain blasted out of them (on my clothes line!) ....
I was hoping to make camo short-shorts out of them, but i am actually not that skilled in sewing and they just didn't fit quite right to transform them easily (too much space in the crotch for boy junk!)
So here is a quick sewing trick you can use with boys shorts, your own shorts, old pants, thrifts jeans, etc....
It really is simple as 1,2,3 !!!
.....................................................
STEP 1 ::
Cut off the legs of the shorts or pants to the length you want your skirt. (see pic above) You can make a knee length or tiny mini!
STEP 2 ::
Cut along the crotch seam. Then along the seams in the front a back...
STEP 3 ::
Fold the cut pieces over on top one another to create skirt shape (like inthe pic below, left folded over right). Sew along the new lines they makes, and cut off any excess from the bottom.
FINISHED!!!!!!!!!
Some majorly militia redneck shit going on here!..... i can't decide whether i would like to make my skirt shorter or not? Or maybe take in the sides?
Either way... hardcore!

XOxoxoxox

DIY: Bamboo & Organic Cotton Crochet Bikini

Usually I like to share projects that are super easy... but what i thought would be fairly simple because the bikini is so small, turned out to be a project that took me about 4-5 days!
I decided to use very thin, silky bamboo yarn and a very small crochet hook so that the stitches would be tight - in fact I did the entire thing in a SINGLE CROCHET (SC) stitch, even though I planned on putting an organic cotton lining on the inside. Which actually made the bikini itself a little bit more heavy then the wispy fly away fabrics we are used to wearing --- if i was to do this project again, i might make a loose fun patterned stitch (filet or shell or leaf) and use a dark colored lining.
But I am happy with what i got! Very cute and perfect for getting a good tan.
..........................................
I started out with 2 separate chains, for the bikini top - which would be able to tie in the front and tie in the back. On top the CHAIN (CH) I did a few rows of SINGLE CROCHET (SC), to add thickness. This would be the bottom of the bikini top.


The TOP::: this was really hard! Since i was not using a pattern, i had to test out at what rate I wanted to DECREASE (D) the SINGLE CROCHET (SC) in order to have my boobies actually covered! I had to pull my first triangle out and start over.


I added each triangle directly into the bottom straps I had already made. I left enough room for it to tie in the front between the two triangles, so that the bikini can adjust with not only weight changes, but also changes to the fabric (stretching, shrinking, etc)...


(see below)....


I used organic cotton, for the top straps and also for the inside lining....


the jersey style fabric has stretch and doesn't fray, making it really easy to work with.


At the top straps, i did a "no sew" experiment, and simply cut some slits into the bottom of the straps, used the back of a feather to push them through crochet holes.. and then tied the pieces together...


way cool trick!


Now the LINING :::


I did sew the lining in with a easy straight stitch on my sewing machine. (I think the "no sew" trick above could also be applied to the lining if done with style in mind.)


ahhhh, finished TOP!!! took me about 2 days or so....


The BOTTOM :::


I accidentally went a little skimpy on the front end, but its easy to add in stitches later along the outside border.... much easier then having to pull your work out and start over.


I used all SINGLE CROCHET (SC) stitches again, and also variations on the DECREASE (D) at the ends and beginnings of each row. The amount you will decrease, will depend on how big you want to make the bikini.


I used a well fit pair of panties to measure off of!!


(working on back end, to cover booty!)


THEN..... i crocheted the front and back pieces together.


(I made them separate because i am better at decreasing, then increasing stitches.)


and added the organic cotton lining, by sewing it in place...


FINISHEDDDDDDDD!!! .....


mostly! I am contemplating adding some SINGLE CROCHET (SC) stitches to the borders along the front sides.... um, for obvious reasons. ;)


(back view)


Now I need the sun and warmth to come back so i can try it on... and wear it till it's thread bare!
YAY!
*
(Will also try to take some pictures wearing it, when it's nice outside! I will add them to this post when i do.)
............................................................
UPDATE :::::::::::
pictures of the bikini!!!!!
on the phone with my mom ... (yep, i don't use a cell!)
Close up....
Skimpy.... but its fits good, and i will get a good tan this spring & summer!
Xoxoxox

Sunday, November 21, 2010

Eco DIY: Crochet Necklace

My eco crafting frenzy continues on (the craft fair my mom entered me in is December 11th!)
I liked this crochet necklace idea so much I wanted to share it with ya'll! There are alot of people out there who love jewelry but have allergies to either metal, chemicals in leather cords, or toxic fabric cords... I am one of those people and so I am always trying to come up with cute shit to wear that is eco, chem free, and safe. For this crochet jewelry project I used soy yarn! (Soy and Bamboo yarns are very silky and have a natural sheen.)
I would really like to elaborate on this crochet necklace idea, but for now here is the simple pattern I made up last night ::::
*
1. (ch) chain stitch --- make a crochet chain the length you would like your necklace to hang. I don't get anal about the math.
2. (s) single crochet stitch --- at the end of your chain, turn your work and do a single crochet stitch in the first hole.
3. (ch) 4 --- make 4 chain stitches off the single crochet.
4. SKIP 2 --- skip two holes AFTER you've made the 4 chains.
5. (s) single crochet --- make a single crochet stitch in the next hole AFTER the two you skipped.
6. REPEAT step #3-#5 --- this repeat makes the lace effect, repeat it till you get to the end of your original chain.
7. THE BALL/clasp --- when I got to the end of the lace, I did 6-8 DOUBLE crochet stitches all going into the same hole at the very end of the necklace. This make a fan or shell shape - which I then folded over once and used a SLIP STITCH to hold in place, the folded over again and did another SLIP STITCH to hold in place, creating a ball shape. The ball can then be poked through the lace holes to hold the necklace on!!! Way cool. :)))
8. Pendant --- I would rather do all crochet and make it really fancy, but for now a nice glass or ceramic pendant is fun! I tied it on with some hemp twine that was the same color as the soy yarn I used to crochet with.
Xoxxoxx

Tuesday, November 16, 2010

The Sh!t I Don't Buy (or use)

For the last ten years I have not bought traditional (aka toxic) house cleaners, dish soaps, body soap, shampoo, conditioner, or deoderant. No, I don't shop lift them or get them for free... I stopped using that stuff and here is how it all started:::
*
When I got diagnosed with Celiac Disease I was told that not only would my diet be changed but also anything I used as a personal care product, on any surface in my home or on my body needed to be gluten free also. Back in the day I already ate organic, and when I sent out nearly 100 letters and far more phone calls to companies trying to search for gluten free & healthy alternatives to clean up with not one company could say they were safe for me to use. Lawsuit worries, combined with the fact that gluten is in nearly every product Americans purchase in ways you would never guess.
What happened at the time was I was really sick, mostly bed ridden, mostly in a wheelchair and I thought 'what the hell, who needs that shit anyway!'
It wouldnt matter if I didn't use shampoo, it wasn't like I had a HAwT date while I was half dead and 80 pounds.
Much to my OCD mother's dismay, I began a life of chemical and gluten free discoveries about ways to naturally keep me and my home clean without creepy goops, sprays, lotions, potions that all came in wasteful packaging anyhow. My hair took a few weeks to adjust. My skin seemed to never care. My mom swore she suddenly could smell my armpitts (even though I had not put on deoderant for years prior to that time)... but I soldiered on.
And now ten years later...
*
Here are the 'cleaners' I use instead of store bought products::::

1. Shampoo/Conditioner ---> Hot water plus Salt (or) Boiled lemon with lavender (or)Straight lemon squeeze (or) Vinegar (rarely unless i do something stupid like put olive oil in my hair to make it beautiful only to discover I can't get it to wash out for 3 weeks!)

2. Deoderant ---> I do like the europeans. Just wipe um' and go. Covering up your special hormonal scent is going to get ya in bed with the wrong kinda guy.

3. Mopping ---> I mop with water mixed with vinegar and baking soda. Alternately if you are not scent sensitive you can use an essential oil mixed in water to mop with, I use cypress.

4. Kitchen/Bathroom ---> A blender helps with this, cause if you blend ginger & lemon it makes an amazing surface cleaner. The ginger will eat through the nasty build up on your stove too! If you don't have a blender, using a lemon or vinegar straight up is good... i use apple cider vinegar cause it's gluten free.

5. Dishes ---> Hot water with fresh squeezed lemon. When something needs a scrub I use salt. If a pot has something caked/burned on the bottom boiling a lemon with water in that pot and letting it soak helps lift the skank.

6. Detergant ---> Baking soda ( and/or apple cider vinegar) works the best on clothes. Lemons are ok, but I don't think the PH is good for the clothes on a regular basis, especially natural fiber clothing.

*
Much of the products people use these days are hype. We are led to believe by advertising that if we don't buy these things we will be covered in germs (I haven't caught a cold or flu or any contagious illness in many years), we are led to believe we will "stink" or be a "dirty hippy", or that babies shouldn't be allowed to crawl on our floor... but new studies have shown all our hand sanitizer use, anti bacterial shit, chemical for hair and body, and paranoia of the natural world (dirt & animals) is actually destroying our health. Doctors think that this faux cleanliness is the leading cause for allergies and autoimmune diseases, not to mention epidemic spreading of colds and flues.
*
The saying is now "cleanliness is next to sickliness"...
and I believe it.
Read about it Here... here and at web MD here.
*
Viva La NO SHAMPOO!

Xoxoxo

Thursday, November 11, 2010

Eco DIY: Bamboo Ruffle Butt Party Dress

Ruffle BUTT! You can never accentuate your ASSet too much, that's why music makes you want to shake it. I saw a dress like this on Etsy but not only was it too expensive for my personal pocketbook but it didn't come in a sustainable fabric in the color purple. (Purple is my favorite color!) I got some stretchy purple bamboo fabric online, and got to sewing this booty jiggle gem.
STEP 1::
I used a tight stretchy sleeveless dress to trace a pattern... it's important that if you trace another piece of clothing for a pattern, that the fabric you are about to sew with has the same properties of stretch or no stretch. I used the heavy book trick (thanks to reader Liberty for the idea!) to hold the paper real flat.
STEP 2::
Lay your pattern on the fabric. I used pins to make sure it was tight. The fabric was doubled, with the fold at the top shoulder... that way I could cut the front and back out at the same time and the shoulders would already be connected without having to sew them.
STEP 3::
SEW. I sewed seams up the left and right side, leaving holes for the arms, where the sleeves were to go. I also hemmed the edges in the back, front and bottom. I was too lazy to take the pins off the pattern paper, and then put them back on again, so i sewed right outside the paper line for the seam, then removed the pattern.
Step 4::::
SLEEVES::::
Why are sleeves so mysterious?? I don't think I ever do them the same twice, every time I am just shooting chance to the sky hoping a sleeve will work.
This time i took the arm hole existing and drew a sleeve that would accurately connect to it. It was a free hand experiment, with no measurements.
I cut out the arm pattern, then doubled the fabric twice to cut all the arm pieces out at once.
Then I sewed the sleeves on, just right on top the hole.
*
I took the scrap fabric pieces from cutting out the body pattern for the ruffle on the butt. I centered the first one and then just crinkled them up and sewed a seam across the top of each crunched, scrunched layer...
THE END::::::::::
Tight and comfy and ruffley- I am going to wear this all day. :)
YAY! Makes me want to DANCE...!
Xoxoxox