Guess where I have been since Thursday??? Re-Wilding classes at the annual
FIREFLY!

Firefly is a local Western North Carolina 'gathering' of people (all ages) who want to learn how to do amazing re-wilding, primitive, homesteading, crafting & earth easy skillz --- it consisted of 4 really intense days of classes taught by lovable teachers who don't just know the skillz but live them every moment of their lives.
I arrived at Camp Pinnacle wednesday night for registration, where i was given a canvas name tag and a little wooden bead on hemp string bracelet to show I was now part of the re-wilding tribe. I was then handed a map, with a LONG list of classes to choose from--- so many classes that it was literally agonizing trying to decide....

Classes available were an expansion on primitive ways of life, and survival knowledge... wild mushroom, tree & plant walks, building rafts, tanning animal hides, carving wooden spoons and bowls, basket weaving, slaughtering chickens & goats, trapping animals, debris shelter & friction fire making, flint knapping, sewing with buckskin, making bows and arrows, DIY Oil lamps, pottery (should I really go on?... you can
see the list here cause you will want to go next year! )

Before any classes began, there was a short & sweet orientation where a man walked out to start a ceremonial fire with a bow drill, using friction (see pic above) - I seriously thought we'd be there for 30 mins waiting for the fire to start but it could not have been more then 5 minutes that he started a whole bonfire, using just friction & his breath into the smouldering kindling. It was f-en incredible!
CLASSES/STUFF I LEARNED::::::
The first class I attended was
spoon carving - a technique that was not easy, but also was shockingly simple. The teacher (Barron, see guy in jumpsuit above) started with just a simple small piece of fresh cut green wood and a hatchet to split it into a thinner piece to begin carving with.
We used tools he had handcrafted himself & our personal knives (cause at this event everyone carries a KNiFe!!) Starting buy gouging out the spoon center, then carving around it....
this is my spoon below, almost finished. Chunky, but oh my gawd I was sooooo proud & love it.

I was really into learning how to tan animal skins, so that I can use them to make clothing and other long lasting items...so I took a
BARK TANNING class with Todd (the rad guy who can start fast friction fires!)
This class was also simple, chemical free yet a hard working process - I learned how to use hemlock tree bark & red oak to tan animal hides--- the bark has to be pounded into a powder and then either boiled down or soaked in water. He said if the water is cold sometimes with Hemlock it brings out the astringent tannins instead of the bitter ones, and FOR realZ he had everyone in the class
taste the tannins so they could know the difference because the bitter ones work better! I totally only sniffed it... ;)

People not only tasted the tannins he had in jars, but they even tasted the tannins holding the animals skin in the bucket - the tannins are so strong, they kill everything (germs, foot fungus) - the color from the bark made a soothing shade of red on the leather...

He showed us animal skins tanned with and without the fur on too - the smaller critters needed a stronger quicker solution, while the bigger ones, start out with weaker solutions. The coolest part was it's REALLY hard to fuck up this process, the part that is most likely to get messed up is during the skinning and scrapping that is done before the tanning.

A favorite class of mine (mainly cause i was totally loved by my teacher Laura) was the
Pine Needle Baskets!!! I have been waiting to learn how to weaves a nice tight basket for along time- and this method was a fairly easy coiling method, using long pine needles. You can use other gathered materials too (I am hoping to make some out of grass, devil's vine, and kudzu).

Using just hemp twine and a needle, we were taught to coil & weave the basket together, in a patterns of circles.

Later on during the night, when I went to decorate my basket with beads, Laura was nice enough to show me how to make
OLIVE OIL LAMPS (which can also be done with animal fat and other slow burning oils). Simply by filling a glass or ceramic jar/container with the oil, then taking a wire, coiling it around a nail, then pull the nail out and shove in a cotton wick. Make the large wire circle at the bottom and handle at the top to make it easy to pull out and stand up...

Have you eva' heard of
Brain Tanning Animal Hides? A process different from bark tanning, but brain tanning makes the leather so buttery soft (without using any chems) it's hard to believe --- I took a class on how to
Sew With Buckskin that had been brain tanned!
Not using needle and thread, but using cordage made from the skin itself and an
awl to poke the holes to lace it through - following the contours of the animals natural curves to decide it's best use (AKA does it make a good shirt, skirt, top, or purse). Parts of the hide are stronger then other, like the neck, spine and bottom - and the outfits need to be made with symmetry in order for them not to get out of shape only on one side.

I am still working on my project, but it's going to be a fringe skirt (shown below) and a bikini top(not shown)! wooo!
OTHER ENTERTAINMENT::::::::::::: FireFly was at a place called camp pinnacle, that had been a summer camp in Hendersonville, NC for the last 80 years. There was a beautiful and warm 17 acre lake to swim, canoe, kayak, dive into- and for some designated areas to even skinny dip in!
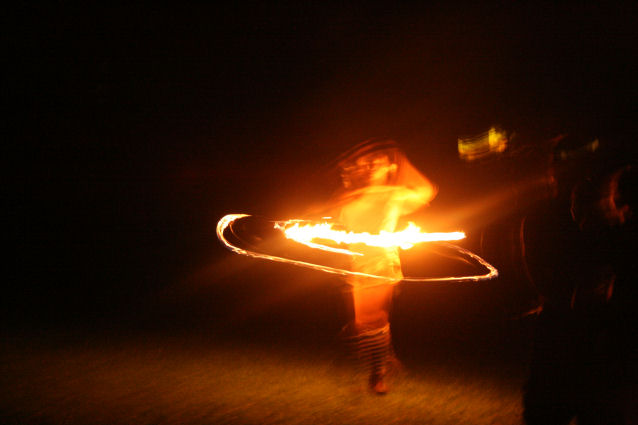
At night there were 3 fires going, with drumming, hoola hooping (fire on the hoola hoops!), dancing, singing, and even some fiddle playin'!

Watching the people go absolutely tribal and bazzzurk around the fire made me feel like i was Britney Spears on the side lines of something really different then myself. I stayed an observer, but one who could hardly stop looking.

Other types of evening activities consisted of primitive potluck & cookoff, barter fair, and my very favorite the "
trade blanket"! No money allowed at the trade blanket, everyone who had something to trade sat in a circle, one by one placing what they wanted to trade on the blanket in the center. Each person had a chance to offer a trade or refuse, some people offered stuff like herbs, mead, massages, fudge, juggling lessons, animal furs, animals antlers, handmade jewelry, feathered earrings, drums, books, clothes....
 Firefly runs on a sliding scale ($$$) for classes, and you can go for the entire event or just for a day... It was totally worth every moment, every penny, and every missed wink of sleep (and even the long drive which was difficult for me)!
 I highly recommend this event to anyone interested in learning how to really live in union with nature, our natural biology, and our deep need to be true survivor.
XOxoxox

 My ever ambitious mom entered me into a craft fair (ohmygawd Mom!), and I have only one month to make a craft booth's worth of eco friendly stuff! I am bracing myself for a month of non stop crafty mania...
 STEP 1:
 STEP 3:
  STEP 4:
 STEP 5:
  STEP 5:
  (this is the knot fringe after it was totally finished- see pic below!!!) Super rustic cute. ;)
 FINIS :::::
 Xoxoxo
 (this is the knot fringe after it was totally finished- see pic below!!!) Super rustic cute. ;)
 FINIS :::::
 Xoxoxo